Setting up your WordPress Author Website part 4: Posts and Pages
The WordPress platform, you have two options to get content onto your website – posts and pages. Post and pages fulfil a variety of purposes on your site, whether you’d like to inform, educate or entertain your readers (or a little bit of each). Posts display differently to pages on your site, so it’s important to pick the right one the piece you’re writing. It’s a simple matter to convert a page into a post through copious copying and pasting, so don’t worry if you change your mind on the status of the piece of writing later on.
What are posts?
 Posts are the basic building blocks of a blog. They are more transient than pages in that they appear as a list on the front end of a
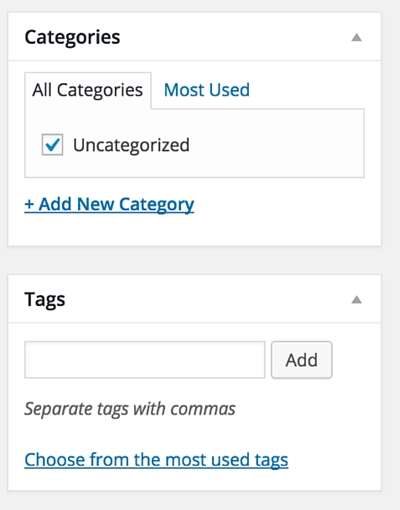
blog such as a WordPress blog, with the latest first and the oldest last. Posts are grouped together in categories that you can specify, and can be linked to each other using tags. Search engines use the category and tag information that you provide as part of your SEO, so use this information to strengthen the image of relevancy Google gets when viewing your website.
Categories and tags also influence the interconnectedness of your website. Through Jetpack (which we installed earlier), posts specified to be related to each other will appear as related posts on pages that are similarly tagged. Some themes also include this as a feature. This is important, because people tend to click on related pages if they found something that they are interested in. This keeps them on the page for longer. The longer readers spend on your site, the more relevant and the more useful Google thinks your site is and thus the higher Google will rank your site. People tend to bounce off sites that they don’t find useful.
Blogging as an author
Decide early on whether you want to blog or not, it’s a whole field unto itself. It is, of course, easier to use blogging to drive traffic to your site if you are a nonfiction author. This is because you can talk about the aspects and intricacies of your nonfiction field of expertise in your blog posts.
Can the same could be true for fiction? What about talking about things that will interest your target reader, the one person who will love your book? If you’re a horror novelist, and your books are like Dean Koontz or Stephen King, why not write reviews and essays as blog posts on Dean Koontz and Stephen King books? That way, readers of that genre might stumble onto your page and stumble on to your books as a result.
In the end, blogging is writing. Since you are doing quite a lot of writing as a fiction or nonfiction author, it is a hard decision to make. Writing even one post of 700 words could’ve been 700 words further into your next book. It’s the Pareto 80-20 principle at work.
There are of course other options, such as Podcasts and video blogging. These forms of content use different types of mental energy to pull off, so that may be an option. Decide where your writing energy will be best spent and go all out for that.
What are pages?
Pages are permanent installations on your website. They stay on the site as links on your menus and bars no matter how old they are. They don’t disappear down the list like an aging blog post. This is useful for the basic information that you would like to provide to all your website visitors:
- Information about you and your business captured in your About Us page;
- Information about the books that you’ve written in your Book Pages;
- Information on how to reach you through your Contact Us page;
- A sign-up page for your mailing list. Here you can describe the benefits more completely of joining that list.
- There are great resources available on these pages which I will share here:
About Pages
(http://neilpatel.com/2014/12/16/how-to-write-the-perfect-about-page-that-drives-leads/)
Neil Patel has a blog on internet marketing of unbelievable quality. Every single post he writes becomes the standard work for that specific topic. Because online business is a big part of being an author entrepreneur, I would highly recommend subscribing to his mailing list to get first dibs on every article he publishes. Even if they seem too advanced, file them away somewhere to have them at hand when you need that information. My Evernote is full of articles he wrote.
By working through his articles, you will have an understanding of the topics discussed that few people in the space have, no matter how much experience they have. Let Neil do the research and the infographics. All you have to do is implement.
The page linked to is his treatise on how to write perfect About Pages. He took the best the web had to offer on the subject and condensed it into a dense informational booklet in blog post form to guide you along the way. Try to incorporate as many ideas as you can from that page into your About Page, as long as it feels natural. Remember there are no rules on the Internet, only guidelines. Go with what works for you.
Book pages
(http://tommorkes.com/perfect-book-sales-page/)
The Book Pages described in this link is more for nonfiction books, but we can apply many of the strategies used for fiction as well. This page makes people want to buy the book. Isn’t that the main purpose of having the book page?
Contact us page
People will generally reach out to you via e-mail more readily than they would on social media. That’s my experience in any case. It has to do with the vulnerability of opening your social media accounts to a stranger. Via e-mail, the only information they’ll get is the e-mail address. Make it easy for your readers include a contact me form on your website in a Contact Us page.
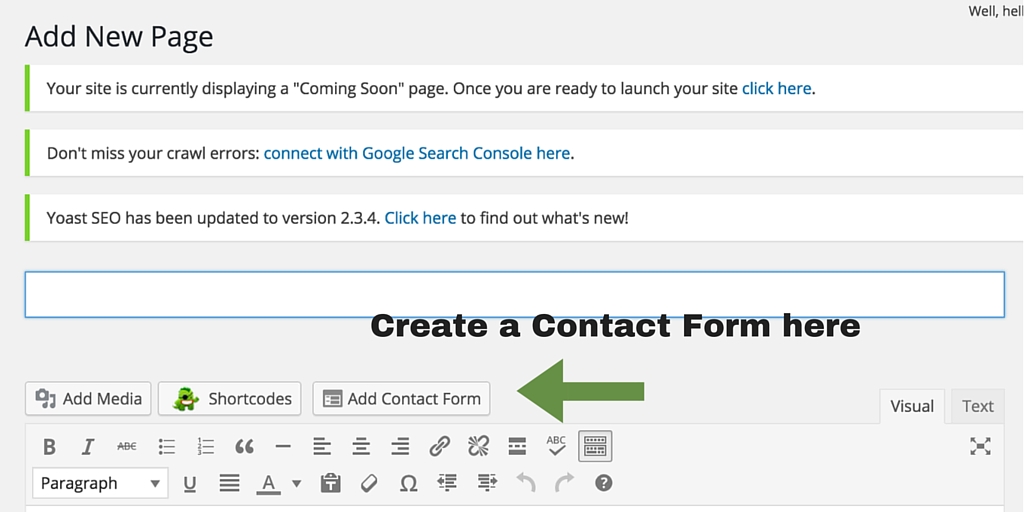
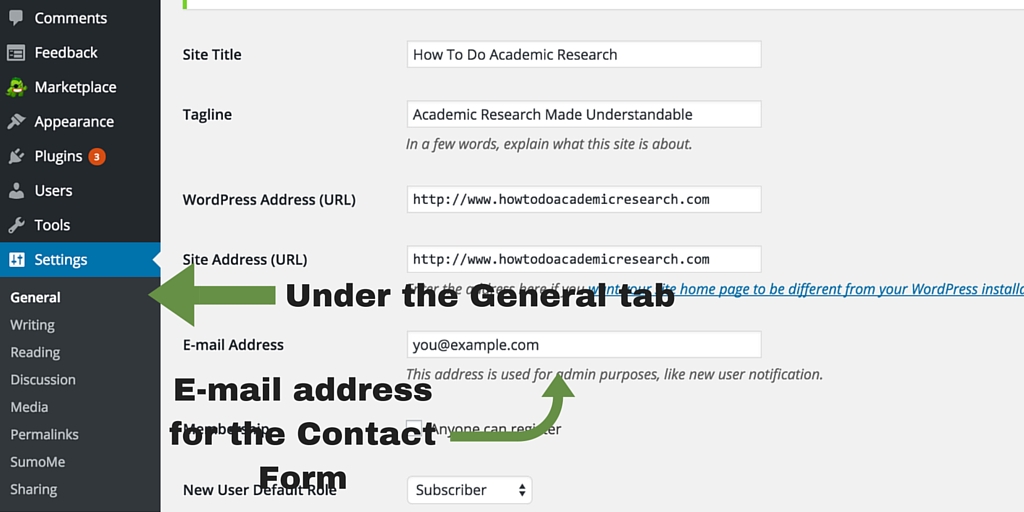
To do so, use the Contact Form feature included in Jetpack on your Contact Us page. If a reader sends you an email, it’ll go to the email address that you specified under the General tab of the settings tab.
Mailing List page
It’s often hard to put all the information about the benefits of joining your mailing list on a simple toolbar and or onto a Pop-up. To remedy this, we can create a page where you describe the benefits in detail. That way, people can make a more informed decision to join your mailing list if they feel like it.
Making Parent Pages and Sub-Pages
 Pages can be directly linked to other pages to appear underneath each other on your website.
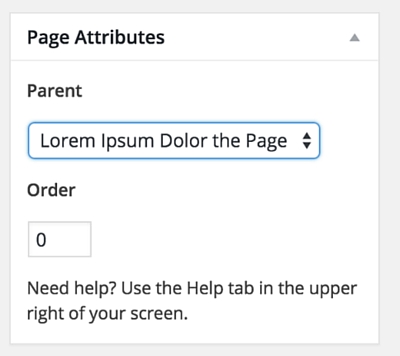
You can do so by setting a parent page for the subpage. The parent page will appear as the main page and the subpage will be linked to it.
You can even change the order in which multiple sub pages appear by changing the number under the Order option. Lower numbers appear higher on the list. 0 will be the top result and 1 through infinity will appear underneath it in sequence.
How to get a post or a page online.
First up, write an article. 300+ words are all good. Some say that longer posts are better, which may be true to a degree. In the end write as much as you think you need to to get your point across. But here’s the important bit, do not write a single word more. On the Internet, fluff is the attention killer. Remember that your reader is and drunken ADD kid who’s watching Die Hard at top volume while eating Cheetos.
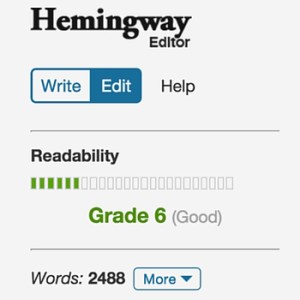 To that end, make sure that you approach your writing with clarity and precision. Make sure that your text’s at an acceptable reading level. By reading level, KISS rules, (and not just the band). Keep It Simple, erm, Smartypants. Run your text through hemingwayapp.com to see how and where you can simplify your writing. (It also helps with spell and grammar checking for free, what a bargain.)
Reading level is one of those things that are best kept as low as possible. Your target reader might have a PhD, but after a long day of PhDing, even she would like some easy to read text while enjoying a replay of Die Hard with some Cheetos. Only use the language you need to get your point across. This article is sitting on a Grade 6 reading level, and Hemmingway tells me that it’s good. Thanks, Hemmingway.
Step one
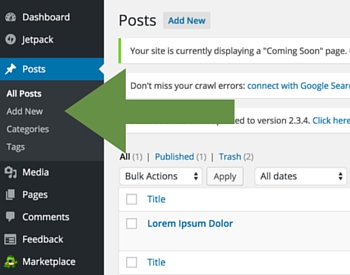 Decide whether the article will be better as a post or a page. This will decide which one of the options you select when you start uploading your article.
Step two
Pick a good title for your article. The title is the single most important part of your entire article, according to Neil Patel.
Did you think I’d get info from another source? I told you Neil is awesome. Every, single, article blows my mind.
The title should also include the keyword that you think people will be looking for when your article will be the solution to their problem. What if their problem is that they don’t know whether Stephen King’s Under the Dome is any good. If you have an article titled “Is Stephen King’s Under the Dome Any Good?”, chances are pretty good that your article will pop up when the reader Googles his problem. (Depending on your page rank, of course.)
Step three
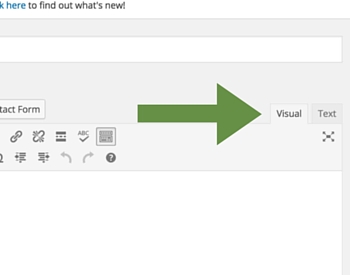 Paste in your awesome article into the body. Make sure that the article your WordPress is Visual mode and not in Text mode. Text mode is for when you want to do some HTML tinkering with your post or page. I try to avoid that, if possible. There is only so many tutorials I can stand to Google before I get distracted by cat videos.
Step four
Add pictures. As many as you feel necessary. Under the Add Media button, you can upload pictures that you own. Use canva.com to make your pictures great. It’s free and easier to use than Gimpshop.
Pictures help in many ways:
Improved SEO
Pictures, and the meta-tagging that goes with them, really helps your cause. Google loves pictures to death, so make sure you label them correctly. Start with naming the picture the keyword that you are targeting and then something about the picture as well. Google looks at the name of the file as well as the meta-tagging.

The title of your picture needs to be as close to the title of your post as possible while describing the picture as well. That way, it tells Google that your picture and article is in line and relevant to that term that the reader was Googling.
The caption is for when you want text to appear under the picture on your website. The title, alt text, and description all exist in the background, whereas the caption is visible to your reader.
Alt text is a bit more information on the picture. Feel free to put in more information here that you deem relevant. This is more space for keywords and keyword phrases.
The description is another opportunity to convince Google that this picture is related to the content.
Helps the reader by breaking up the text
A wall of text is a daunting read. Ask any Highschooler of their experiences with How to Kill a Mockingbird. Make it easier on them by giving them pretty things, related to the content, to look at. If you follow Neil Patel’s route, and you should, use as many infographics as you can stomach.
Pictures help you get your point across
Reading text isn’t the best for teaching everybody. Some people are visual learners, and this is where your pictures can give them a leg up. Use your pictures to punctuate your points, that way, there is a higher chance of reader retention.
Pictures make your site look better
The fact is, pictures look better than text on an aesthetic level. Use them to make your site look great and interesting. A site with pictures is welcoming and friendly, and does not resemble a Government Gazette on the latest traffic by-law amendments for the protection of lesser spotted rainbow pelt unicorns on rural roads.
Where to get free images
If you’re a photographer with a nice DSLR on hand, then you are ready to rock some cool pictures for your site. But if you’re not, like me, then there are huge collections of free images available out there on the web:
Neil Patel’s post on where to find pictures (because of course he wrote about it)
ShopifyNation’s massive post on 73 free image sources:
For every problem, there’s a solution out there for you on the internet, (usually for free). I love the internet.
Now that you have pictures, if they have a Creative Commons Licence, feel free to to dolly them up with Canva.com to your heart’s content. Here’s some more information on Creative Commons Licences.
SEO your new content
Chances are, that you wrote your content without the sole focus of having it SEO’d to the max. That is good. There can be some readability problems if you approach content in this way. This is where our Plugin Yoast SEO had it’s chance to shine. Simply put, it’s like having an SEO expert on hand telling you what to do to make Google love your content.
Step one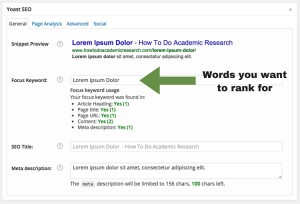
Start by putting in the keyword phrase into the Focus Keyword box that you
think that you’d like to rank on Google for. This is the phrase that the person might be searching for when they’re trying to find the solution that you’re writing about. This will let Yoast SEO know what to look for.
Step two
Now you can change the Meta Description and even your header text to match the keyword that you are looking for. The snippet preview shows how the page will display when it appears as a search result on Google.
Step three
Once you’ve completed all this, hit publish. Yoast will only draw through all the information from the page once you’ve hit publish. Now, the Focus Keyword usage will populate properly.
 Step four
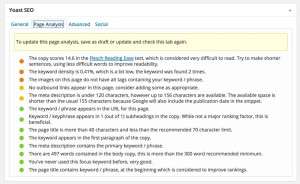
Next up, click on the Page Analysis tab on Yoast. This will give you a list of things you’re doing right, as well as things that you can improve on.
Remember to hit Update whenever you change things, to make your changes live. This is also where Yoast will tell you whether your SEO is good or not on this page.
Step five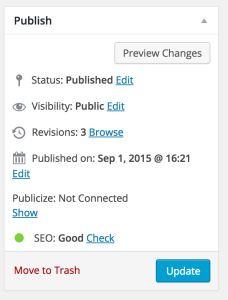
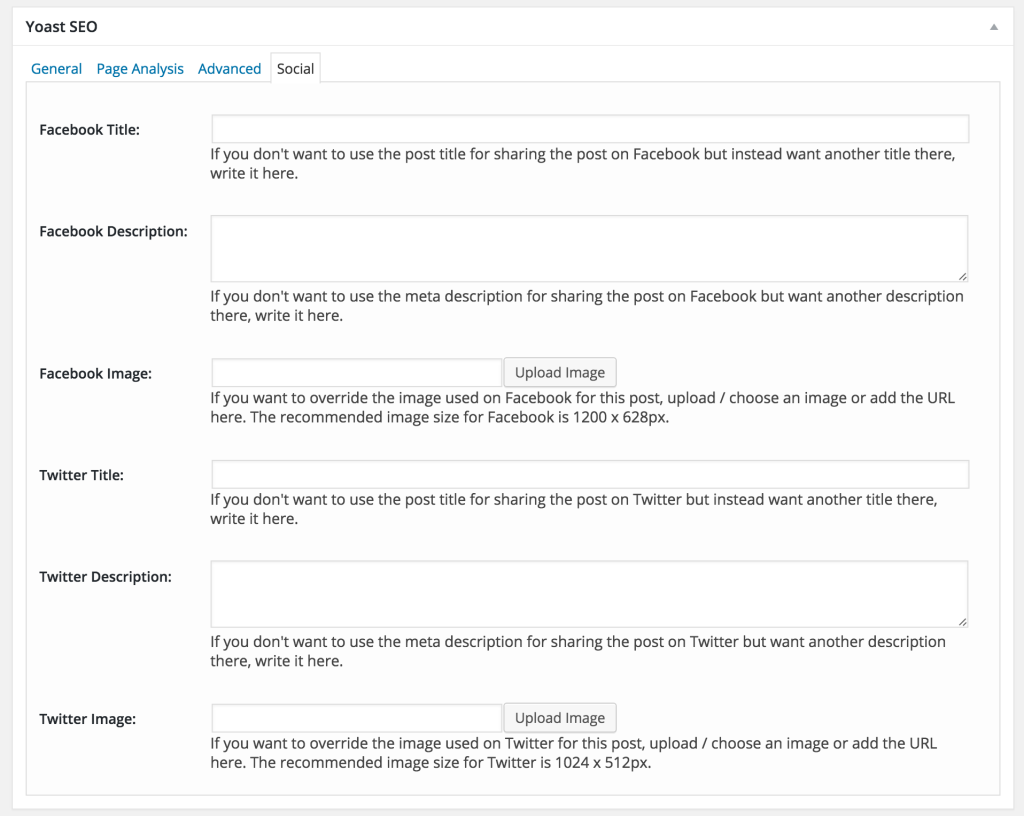
Make a picture for each Social Media outlet with canva.com. Mostly, this will be your featured image cropped for the various sizes required by the specific social media platform. This way, whenever someone shares your post with your SumoMe share buttons, that awesome picture will be pulled through and look mucho professionale.
And there we go! Your page is now online and given every opportunity possible to be an awesome resource and traffic driver for you and your website.
Next up, let’s make this site look good.