How to Make an Author Website Part 2: Setting up WordPress and Plugins
We’ve set up your hosting with Bluehost and WordPress installed onto your website. Now it’s time to set up WordPress. We’ll start with the general set up of your website, starting with the site’s name, description and page types. We will also look at the comments settings (we don’t want people to be able to comment on every single page, mostly just on blog posts).
To Start: Log into the back-end of your WordPress site.
To get into the back end of your WordPress site go to your site’s URL. Usually, it’s http://www.thesitenameyoupicked.com. Here you’ll be able to log in to the admin side of your website itself by clicking the Admin Login option. Or, you can just use http://www.thesitenameyoupicked.com/wp-admin to get to the same thing. It’ll prompt you to put in the username and password you selected for your WordPress login. (Not your Bluehost logins, but the logins you selected later on when you installed WordPress.)
Now you see the back end of your site. On your left-hand side, there is a menu and that is where we’re going to start.
Step one: General settings: Site name, Descriptions and Permalinks.
Down on the left-hand side of the interface there is a tab named “Settings”. Click on that to bring up more options we are looking at the General settings to begin with.
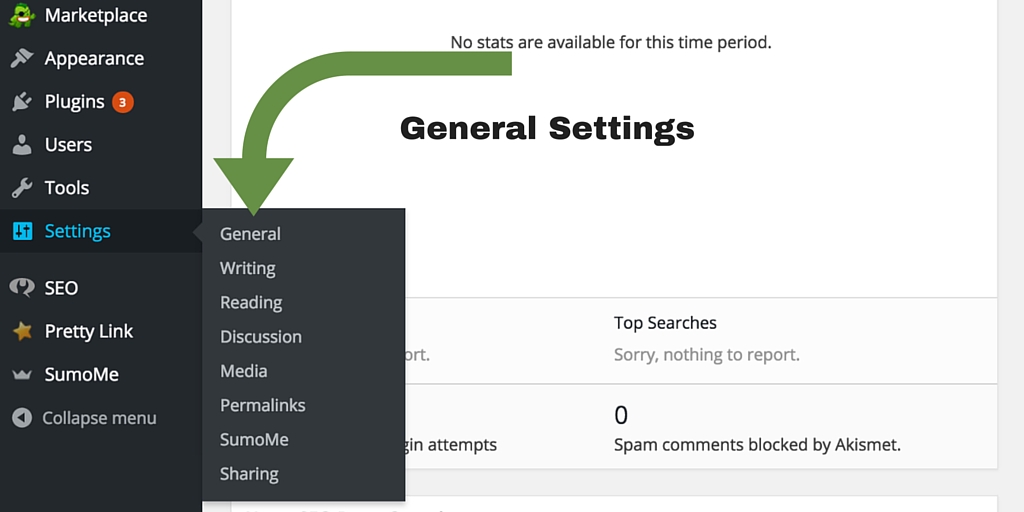
Here you can select interesting things like your time zone and such. Most important thing is your site title and your site subheading. This is important for Search Engine Optimisation (SEO) purposes, so put in as much relevant detail as you can here. It can be something like Site Name – Joe Author’s site. Subheading: The homepage for Gothic Unicorn Romance Novelist, Joe Author. Be creative here, this information will pull through on the top of a browser and as part of your website profile for the Google Crawler.
Permalinks settings
This is where WordPress hides away the settings for your posts and pages. The important sitting here is the change sure post display sitting away from the atrocious default to post_name. That will set your new posts and pages to look a lot better as a URL. For example:
http://www.thesitenameyoupicked.com/new_post
As opposed to:
http://www.thesitenameyoupicked.com/pageid114?dd_bleargh.
This is better for SEO and for an improved user experience. I have no idea why WordPress does not use this as the default setting.

Discussion settings
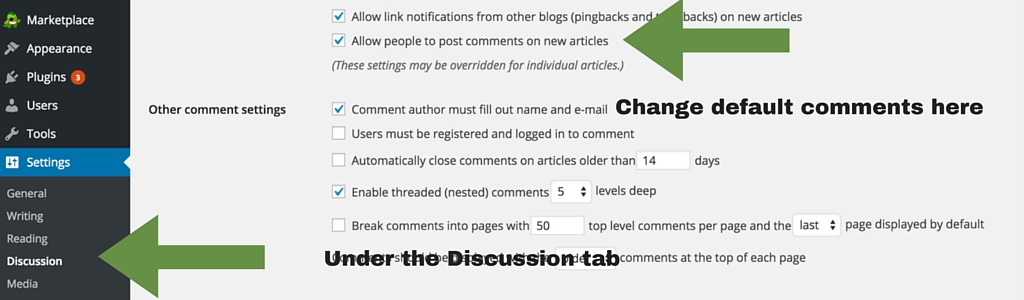
We don’t actually want people to be able to comment on every single one of our pages, so as a default maybe it’s better to turn off Automatically Allow Comments. To do this, We change the sitting under the Discussion tab that says Automatically Allow Comments on new pages and posts. It’s a checkbox.
If you would like comments on an article, activate comments for that specific one in the Quick Edit post function which we’ll get to a bit later.
Step two: Themes
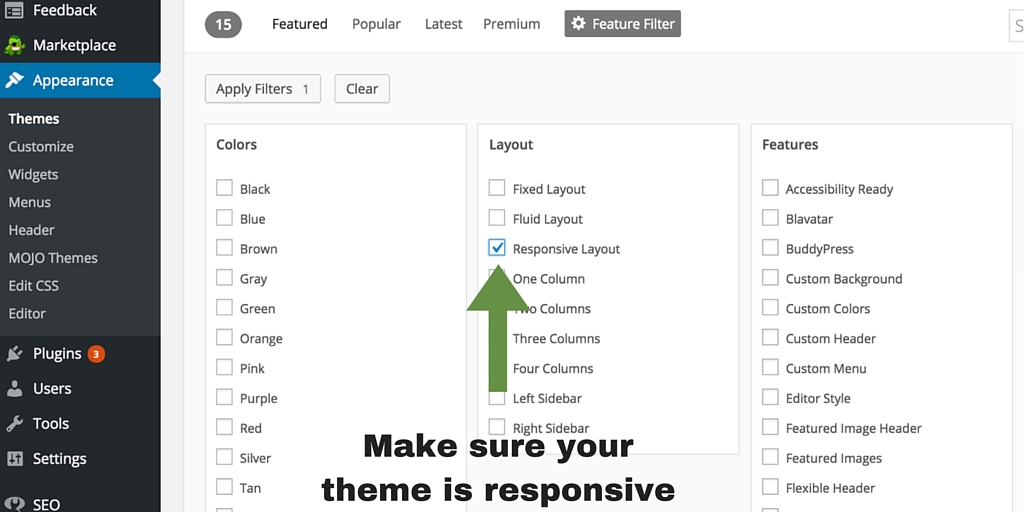
Rule Number 1 of Themes: Always look for Responsive Themes.
Traffic is increasingly mobile in nature, and you need to take that into account. Luckily it’s a lot easier than it was. Before, you needed to install plugins or have a whole different website (.mobi), to be mobile friendly. Now all you need to do is to make sure that the theme you select for your website is responsive. Most modern themes for WordPress are.
Another reason we are looking for Responsive Themes is that it is one of the factors that Google looks for in a site when deciding how high to rank your site in their search results. It’s a good idea to go with them on this.
If you’re having in seem designed for you, be sure that you tell your designer or developer thought you would like a Responsive Theme.
Rule number 2 of themes: You don’t have to pay (but sometimes you should).
To start with, go free. At the beginning of your experience with WordPress websites, many times you won’t know exactly what you’re looking for in a theme. You may not be sure how the theme is going to respond to you as your website evolves. Thus, if you are spending $50 on an awesome premium theme from Theme Forest or through a developer, and you discovered later on this site no longer fits with your ideas, you spent $50 on something you’re never going to use again. For that reason, I advise playing around with free everything until you feel comfortable with the platform and with your online presence.
On the flipside, often times paid themes are cool and free themes are limited or sucky.
WordPress itself offers quite a lot of themes for free or a fee. It’s a good place to start, but as soon as you start moving towards a more professional approach perhaps the free themes will not longer suffice. Sites like Theme Forest offer premium designs for a once-off fee. You can use these over and over for as many websites as you like (unless the license says otherwise). On the whole you pay once and the theme is yours to do with what you need to do. For my sites, I’ve decided to go for cheap Theme Forest themes. One cost $20 and the other one $8, so it was actually not that expensive.
How to install a theme.
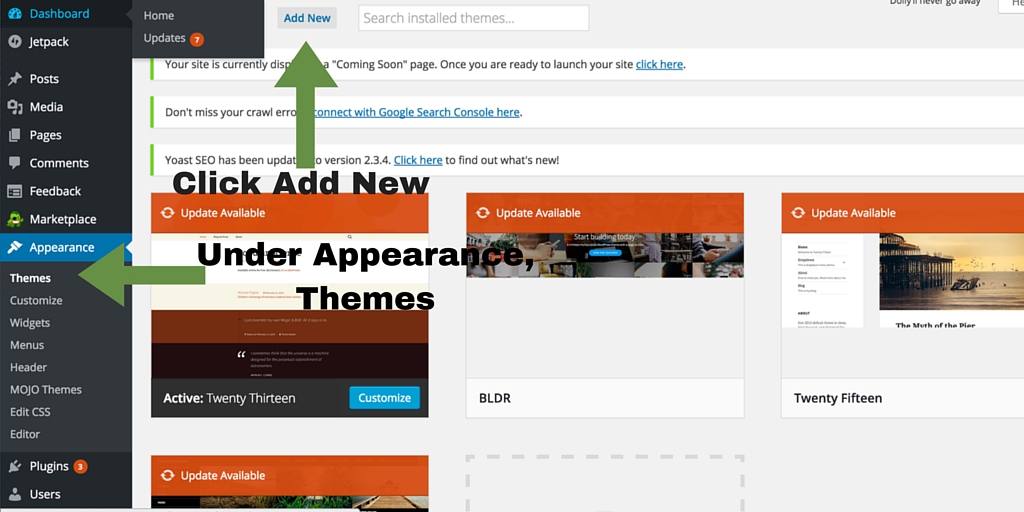
Go to the Appearance tab and select themes.
Click on Add New
 Here you can either Upload the Theme Forrest theme, or click on the Feature Filter to narrow down the huge amount of themes available.
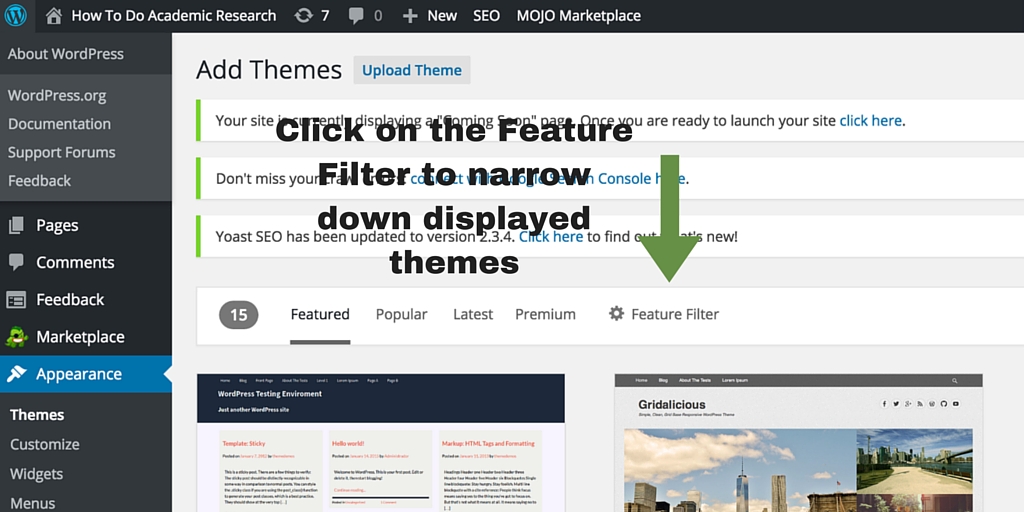
Make sure that, whatever you do, the theme is Responsive. Click on the Apply Filters button when ready to rock.
Now you can find a theme from the ones that meets the filtered desires. You can have a look at how it would look like on your site by selecting preview. If you’re happy, click on Install Theme.
Now click on Activate Theme to get it to be your active theme. This will replace your currently active theme, if any.
And there you go, theme installed and ready to rock. Now you can click on the Customise tab to get really into getting your site looking golden.
The Customise tab: Live site faffing until it looks awesome.
Here you can change headers, theme colours, even the themes themselves if you feel like it. You can also change the widgets on your website. Widgets are little plugins or little tools on your website that has some sort of functionality. Such as a button for people to like your Facebook page, see a menu of some sort, or even a picture. I’ll go into a bit greater depth about this in part five of this course, but for now please resist the urge to put in all the widgets. (In fact, remove some, if not all.)
Step three: Plugins
Next up we have plugins. Plugins are like apps for your website that are installed on your WordPress framework. They change things on your website or tracks things in the background. Here’s a list of the plug-ins that I recommend starting with:
Akismet and Jetpack are built into the WordPress framework. All you need to activate them to get the benefit. The others you can install from the Plugins menu under the Add New option.
Jetpack
Jetpack is a group of plugins for the WordPress framework that designed to make your life a lot easier. It can take care of contact forms, basic site statistics, and site icons. (Site icons are also called favicons – those pictures on the top of your browser next to the site name when you open the page).
Akismet
Akismet is a spam blocker, and a pretty effective one at that. The price is also right ( it comes free with the WordPress framework). The basic settings will take care of most spam leaving you worry free. Without Akismet, the comments section of your blog will soon become an advertising board for everyone with the website scraper.
Yoast SEO
The first of the plugins that we will install via the New Plugin option is Yoast SEO. The free version of this plugin is a must-have for making your pages SEO optimised. It is immensely useful. It will test each page and post on your website in line with keyword phrases that you set, in line with built in SEO guidelines that Yoast maintains. Simply having this plugin and following it’s guidelines under the Analyse Page tab of the plugin will make you a better SEO copywriter. With it, you will have a fighting chance to rank high in Google search ranking.
Sidenote – What is SEO?
When you’re talking about websites, people are always talking about SEO. SEO stands for Search Engine Optimisation. In short, SEO is how well search engines can tell what every single page on your website is about to match your site content with what a searcher is looking for. For example, if someone is looking for unicorn skin covered coat hangers, and your site has an entire article dedicated to the joys of unicorn skin covered coat hangers, by adhering to SEO guidelines, your page should be on page 1 of the Google search results in case there aren’t that many people who have similar pages. SEO is in your control, the amount of other people who have similar pages to yours is not. Do your utmost in creating SEO pages on your website so you can sell some unicorn skin covered coat hangers to the legions of unicorn skin covered coat hangers aficionados.
On the side note, if you’re wondering why the previous paragraph reads a bit oddly, you can you ascribe that to the overuse of keyword phrases, in this case, unicorn skin covered coat hangers. So now you know what overuse looks like. Don’t do it. Allow Yoast SEO to tell you when you are going in the right direction or the wrong with your SEO.
Disqus
A plugin that I did not show in the video, but that I use. It’s currently not standard everywhere, but it does help with managing your comments section. Disqus is a centralised comment app that links all comments by users on different sites to a single profile. This profile can then be used to add comments to other people sites who run the app as well, and many sites do. This means that you don’t have to spend a lot of time registering for sites, logging in and suffering additional password fatigue, and neither does your users. Your Disqus account pulls your details from their servers and onto the website where you’re leaving your comment. This makes it both easier for you and your readers to comment.
SumoMe
Where Yoast SEO takes care of all your SEO needs, SumoMe takes care of all your internet business needs. This amazing free app allows you to create pop-ups and header bars (smart bars) for mailing list integration, as well as stylish share buttons for social media with an intuitive and user-friendly interface. SumoMe keeps adding new apps to this plugin in order for them to trial their paid suite of products. I’ve been tempted to try the paid versions, but the free versions are still good enough for me.
In the next part, we’ll be linking SumoMe with Mailchimp for you to get your mailing list growing.
Prettylinks
We will be using a lot of links, especially affiliate links, on our author websites. A link shortener, like Prettylinks, will make our pages look less cluttered and easier to distribute over other media, such as audio. An example of the pretty link that I’ve used is the Bluehost link, https://www.dauntlesswriting.com/bluehost, which takes you to Bluehost with my link without adding a lot of extra random information. It makes it easier to verbally tell people where to go to, which gives Prettylinks an advantage over other link shorteners such as bit.ly. You can, of course, use both, but I preferred pretty links as a plugin to my website.
Prettylinks also tracks of the clicks on your links said you can have an idea of how many people have used your link over a period of time. Nice.
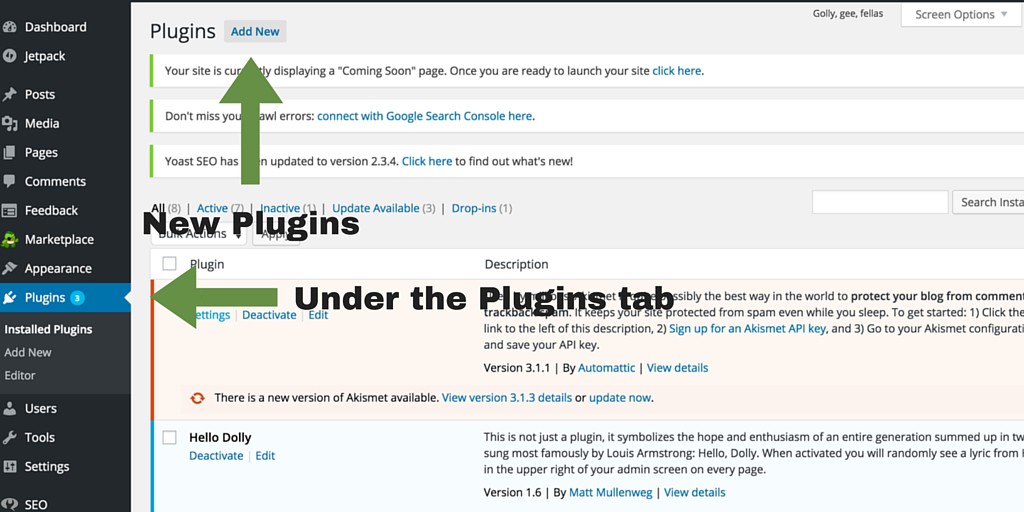
How to install plugins
Go to the plugins tab on the right-hand side of your Dashboard and then click on the add new option on the top right.
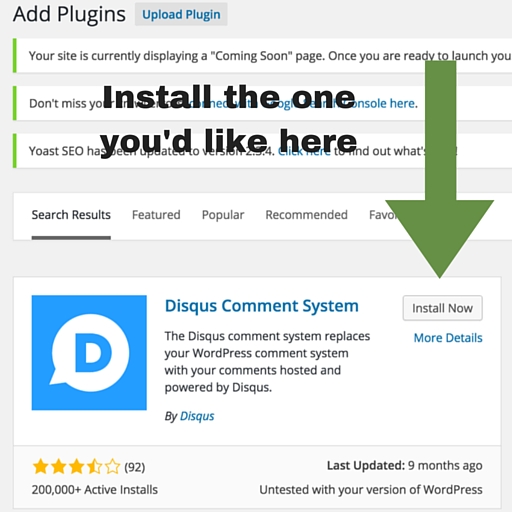
Now search for the plugin you’re looking for in the Search Plugins tab.
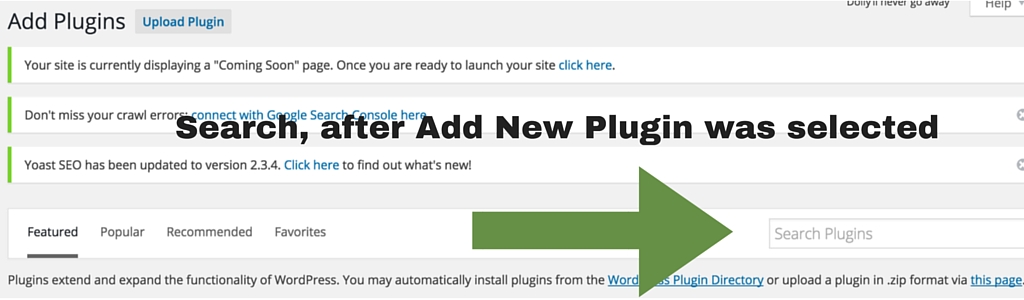
Then click on the Install Now button.
Now, click on the Activate Plugin link to get it loaded onto your website. Aaaw yeaaah!
Okay, now that we’re doen setting up WordPress and Plugins, we, are now ready to set up and link your mailing list with Mailchimp and link it with SumoMe. For that, we head onto the next video and page.