
How to Make an Author Website Part 3: Linking MailChimp with SumoMe
Now that we’ve set up the theme and some plug-ins, it’s time to link our website with MailChimp. It is an e-mail service which will be our bulk email service provider. I’ve chosen MailChimp for this example because it has the unique selling point of that first 2000 subscribers they manage are free. Although this isn’t the best option for a more advanced mailing list, it’s a good start. You could always export your mailing list from MailChimp when you feel like having a more comprehensive package on another mailing list server, such as Aweber (which I currently use), Infusionsoft or any of the others.
Signing up for MailChimp
MailChimp, like many other any online businesses, have quite an easy sign-up process. Especially considering that you don’t have to enter payments details to begin with. It’s the usual things – name, business address (where you are conducting your business from) and some business information.
For MailChimp, your business address is important because they want you to include it into the emails that you send to people on your mailing list to appear less spammy. All they want is for fewer people to report e-mails sent from a MailChimp account. It does happen every time you send out an email. But don’t worry about this, because if you are attempting to provide value to your subscribers instead of just sending them a whole pile of offers, the number of reports will be low. Lower reports mean that e-mails sent from any MailChimp account do not end up in the spam folders due to automatic sorting by e-mail providers, such as Google Mail, so that a win for you as well.
After putting in all your details, MailChimp will send you an email which serves as both a confirmation of your email as well as a link to the next step.
As part of the sign-up process, MailChimp offers a sign up for their e-mail marketing course. It’s well worth your time. They cover the basics of good mass-mail etiquette and e-mail marketing.
Creating your first list
Now that we’ve signed into MailChimp we have quite a lot of options. Normally, we have much more to set up, but, in this case, we can skip all the hard bits and just create a list where SumoMe will feed subscribers to. You can create a whole campaign with forms and all those kinds of things with MailChimp if you like, but that’s not required for now thanks to SumoMe.
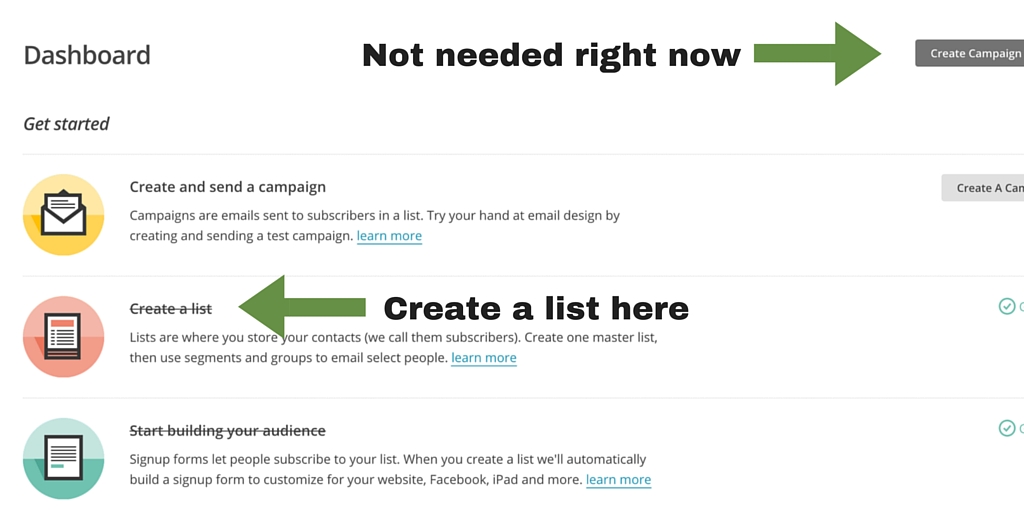
So head on down to the Create a New List option on your MailChimp account and fill in a few details. The basics are:
- The name of the list for easy identification;
- The personal name that you would like to appear on the emails that are sent from this list; and
- The email address from which you would like emails to be sent from.
Good times. Now we can link this list with SumoMe.
Linking MailChimp with SumoMe
Back on your website, register for SumoMe. It’s a matter of username and password x2 to get SumoMe to set up. Because again, the basic options that we are going to be using are all free and thus does not need any more details than just basic account. No taking out your credit card here. I’m severely tempted to use their advanced options every time I see them, they look pretty useful. Added to that, SumoMe offers free courses for internet business skills if you are a SumoMe Pro member. (Which you get if you’ve bought something from them.) I won’t lie, this type of value-added services will get me signed up sooner rather than later. Oh well, that’s just the power of adding value to your subscribers. Oh, by the way, sign up for SumoMe’s mailing list as well. Loads of value there, and sometimes freebies as well.
SumoMe has a short tutorial to show you how to install their programs, starting with their Google Analytics plugin. It is quite useful if you Google Analytics account. Later on, when you’re getting advanced, it is a good idea to go register for Google Analytics to keep track of the visitors to your site and to get biographical information from them. This will help you drill down to who your actual readers are so that you can tailor your website to wow them. We’re not going to be using Google Analytics right now, but it’s good to have it installed anyway. You can always link your Analytics account to it at a later date.
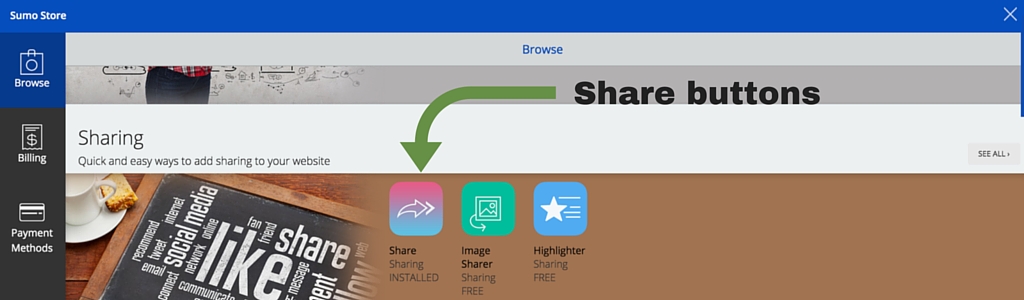
What we are going to be using right off the bat is the Social Shares Buttons and the mailing list plugins that SumoMe offers. Let’s start with the SmartBar, which I have included in the video.
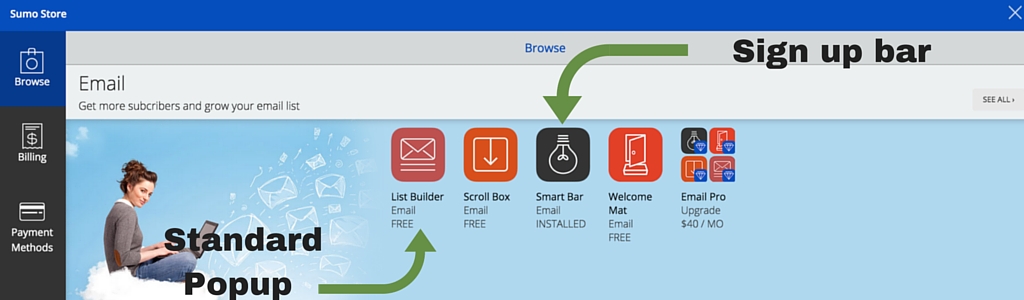
You can also insert pop-ups this way, As well as more generic sign-up forms. Use at least two features – one static, such as the Smart bar, and one active, such as the pop-up List Builder, to capture leads for your email List.
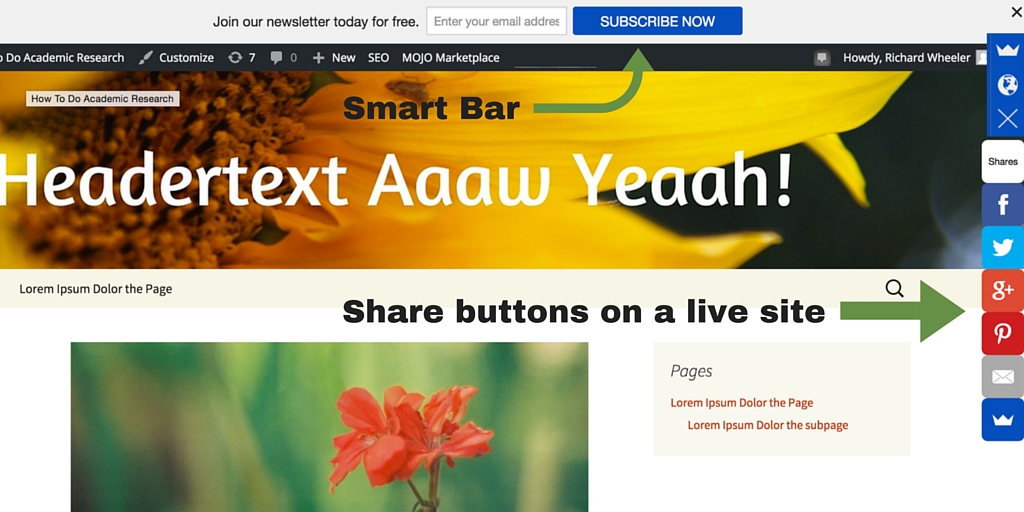
The share buttons don’t need any further setup. It will get the information that it needs from your Yoast SEO setup which we will take care of in the section. So for now, just make sure it’s active.
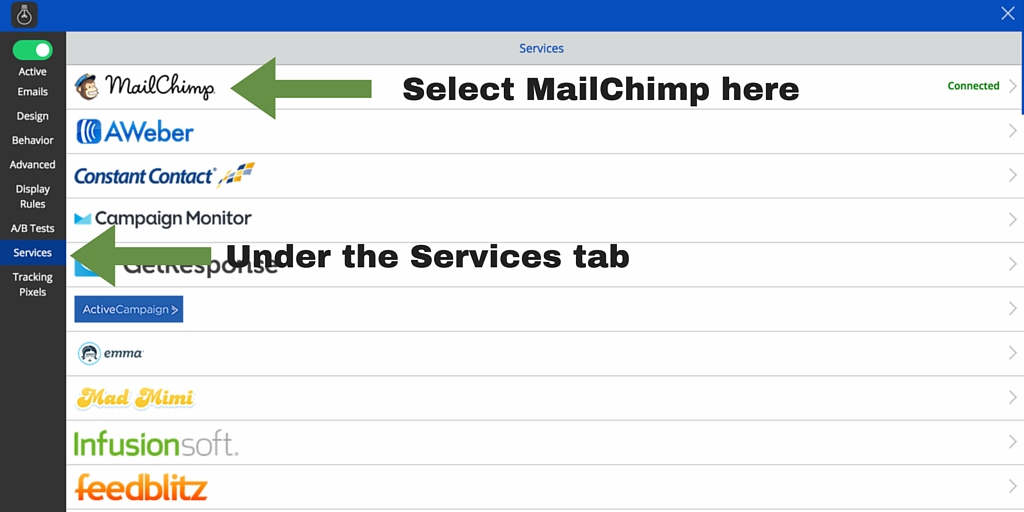
In the video, I use a Smartbar to show you how to install and link your mailing list with SumoMe. To do so go to Services, and select MailChimp. It’s right on top of a whole bunch of other mailing list services. If you get another service, this is where you can link those as well.
The appearance of your List Builder pop-ups and your Smart bars can be altered anyway you like. The colours, size and shape can be tailored to suit your website. Play with the settings until they fit your style. The share button they can be tailored to a degree, mostly more or less rounded or moved to where they would be the least obtrusive. I prefer mine on the right-hand side, but that’s just me.
Alright! Your site is now fully functional as an author-entrepreneur website. You can capture emails and have great SEO to get Google to send some readers your way. But what about the content on your site? In the next part, I will be talking about posts and pages and how you can make them work for you.